• Home
  • Portfolio
    • Work
    • Resume
    • Linked In
  • shop
  • Contact
    • about
    • send a message
    • Social
      • Linked In
      • Instagram
      • Pinterest

CINDY LACKEY

DESIGNER

Valentine’s Day DIY + Felt Heart Pin

01_hero


We have a pretty silly Valentines Day tradition. B and I wear big puffy felt hearts all day! They reminds us of our love while we’re off at work or out in the world.

I made this set maybe four years back so I’ve drawn out the tutorial for you guys. It’s super easy to craft together for a last minute Valentine’s Day surprise.

.
02-1_drawing-Materials

SUPPLIES

2 sheets of craft felt

this heart template (or just free hand it)

embroidery floss + needle

a small bit of pillow stuffing

safety pin

pen
02-3_drawing-Make


TO MAKE

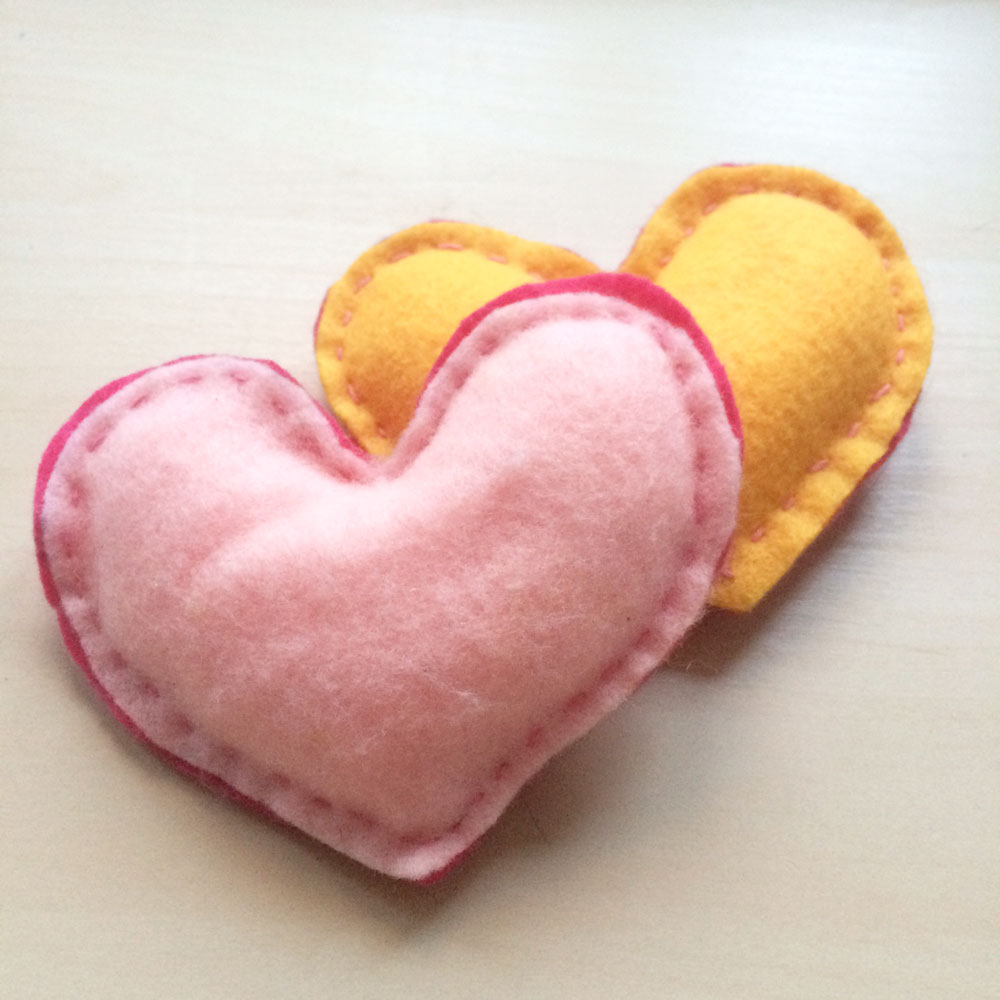
Cut out two hearts from the felt using the template and pen. Stitch the hearts together with embroidery floss about 1cm (about 1/2”) from the edge. Leave a small 5 cm (2”) opening with the needle and thread still attached. Stuff the heart with the stuffing and close up and tie off your heart. Stitch the non-opening side of the safety pin to the back of the heart at the fullest part (or just above).

I jazzed up my heart a bit by cutting away the top felt at the humps just a little to reveal the back felt. I encourage jazziness whenever possible.

.
05_final


Now, pin the heart to your chest and wear it proudly.

Have a happy Valentine’s Day!

.
04_final-diptic

DIY + Marble Phone Case

01-hero2

One of my (too many?) new year’s resolutions was to try not to use gold/copper/something shiny in every craft project. In an attempt to curb my obsession I’ve been looking at new trends, like marble. Granted, my inspiration for this DIY was Julia Kostreva’s gold flecked marble iPhone case, but I still feel it was the right direction!

.
01-herodiptic


Nail polish marbling takes a couple tries to get perfected, but once you get the hang of it, it’s difficult to resist dipping EVERYTHING in.

.
02_supplies-brownpaper

SUPPLIES

clear phone case

nail polish (I used essie in blanc)

warm water

shallow disposable container

mixing stick (like a chopstick or a toothpick)

helpful holding suction cup tool (the one I used was borrowed from our shower caddy)

nail polish remover (for corrections)

.

03-tomake-collage_4sm

TO MAKE

Fill the container with enough water to allow the case to submerge. You want the water slightly warmer than room temp so the nail polish doesn’t dry too fast. Secure your helpful suction cup tool to the case and get ready to work quickly.

Pour a small bit of the polish in. It will dissipate into a film. Then add more polish on top of the film in a swirl. Working quickly, stir the polish with your mixing stick into a marble swirl pattern. Submerge the case into the pattern. I felt that about a ‘half way up the side of the case’ submersion was ideal for keeping the paint out of the inside of the case while still maintaining full coverage on the back of the case. Remove and let the case dry.

Use the nail polish remover to touch up your design or remove the pattern completely and start over till your happy with the design.

EDIT: After some in-the-field testing, I realized that, of course, a protective coat is necessary to keep your final design pristine. I applied a few coats of gloss Mod Podge spray but clear Minwax or Krylon Crystal Clear would work, too. Alternatively, you could create your design on the inside of the case. Happy crafting!

.

04_finalcollage_3sm

DIY + Wooden Bead Trivet

01_hero
02_hero

I started out this little DIY a week or so ago. I was super inspired by this tutorial I found on Carnets Parisians (it’s French).  I really like how it’s a string of beads instead of a loop. So cool and French, somehow! I thought I would mix it up with a couple sizes of beads and a bit of white paint. Easy-peasy. And it all looked great till I placed my lovely delicate glass tea pot on top and things started to roll (as round beads will). Maybe something got lost in translation. Anyway, it was back to the drawing board.

I had spotted these lovely faceted beads in the wooden bits area of our local craft shop and I finally had time to go and snatch them up this weekend. Not only are these faceted beauties right on trend they also have gloriously large and flat bottoms (hehe). I used 5 of these “lemons” for my trivet string. Three fit well under my glass tea pot (with a cute tail of two) and all five work best for larger pots and pans.

03_2pots+detail

SUPPLIES

3 ply jute twine

Five wooden lemon beads (or other large flat bottomed wooden bead)

Eighteen 12mm round wooden beads

(optional) Two 10mm round wooden beads

white craft paint (I used Martha Stewart Crafts Multi-Surface Satin Acrylic in Wedding Cake)

thin paint brushes + holding cup

.
04_supplies

TO MAKE

Pop a few of the 12mm beads on to the ends of the thin paint brushes and give them two coats of white paint  (I painted 6 beads). Allow a bit of dry time.

.
04_tomake


Thread the optional 10mm bead onto the jute, or just start with a 12mm bead. Then thread on the rest of your beads, I used a 3 to 1 pattern to keep the big lemon beads separated and I tried to add the painted beads randomly. Tie off the jute at each end with a square knot around the last bead and thread the jute tail back into the bead.

.
05_close1

06_close2

Now go forth and cook up some hot stuff, hot stuff! (see what I did there?)

  • Newer
  • 1
  • 2

about

Hello! I’m an interior, user experience, and graphic designer with a love for purpose-driven minimalism. I am also a digital nomad originally from California, currently living in Barbados, by way of Colorado, with my husband and our two cats.

FOLLOW ALONG

  • Instagram
  • LinkedIn
  • Pinterest

just what you’re looking for

© Cindy Lackey | Site design handcrafted by Station Seven